How to use images to get the biggest bang out of a blog post
Ever click to an article, see a huge amount of text devoid of images, heading or formatting, and completely give up on it before you’ve even started reading? Yeah… me too.
Did you know that…?
- 90% of information transmitted to the brain is visual, and visuals are processed 60,000X faster in the brain than text. (3M Corporation and Zabisco)
- Content containing related images get more views and tend to perform better across all content categories. (Skyword)
- Articles with relevant images achieve 94% more traffic than those without (Skyword)). That’s almost double the views!
- On Facebook, posts with images get 53% more likes than posts without. What’s more, photo posts attracted 104% more comments than the average post. (HubSpot)
- 71% of the world’s web users share content online and 43% of them share images. This means that images are the most shared type of online content. (Ipsos)
If you think about it, these statistics aren’t that surprising considering that our eyes naturally gravitate toward images. Also, content is much easier to consume when it’s broken up by interesting and/or eye-catching graphical elements.
So if you want to create blog posts readers will love, read on to find out what type of images work best for your post, where to find them and how to use them properly to keep visitors engaged with your content.
Why you need images
As Sonia Simone, associate editor at Copyblogger, wrote in this post, “images are steroids for your headline”.
You probably know just how hard it is to write a great headline. By including a great image, you can give your headline a huge boost. The image can be funny, heart-warming, odd or curiosity-provoking, as long as it makes people want to click and read that first paragraph of your post.
In other words, every image you use (especially your featured image) must pack an incredible punch in order to get readers to read that first line of your blog post. (And the job of the first line is to get the reader to read the second paragraph and so on.)
Images are a great way to:
- Attract a reader’s attention and pique interest even before any text is read
- Set an emotional tone. A powerful image can create an emotional reaction that you might otherwise have to slave for hours to craft with words.
- Show the personality of your blog. Is your article compassionate, goofy, funny?
- Arouse curiosity. An unexpected juxtaposition can be the ticket to move the reader forward and right into your fantastic post. Get an image that either creates a seeming paradox with the headline, or just amplifies it in a surprising way.
- Add something interesting and relevant that breaks up the sea of text in your posts.
- Hold people’s attention while they’re reading through your posts.
- Strengthen or enhance a point, argument, fact, opinion or statement.
Types of images and when to use them
1. Stock photos
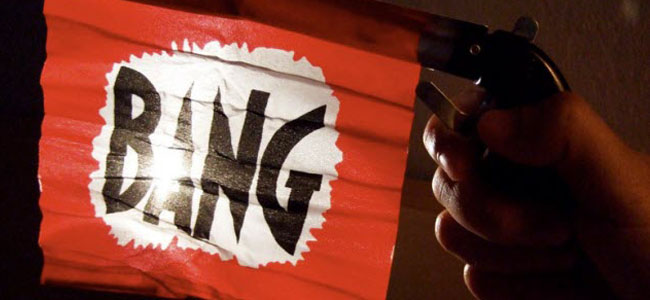
There’s more to stock photos than business guys in suits shaking hands or walking along growth charts. When used correctly, they can elicit real emotions in your readers.
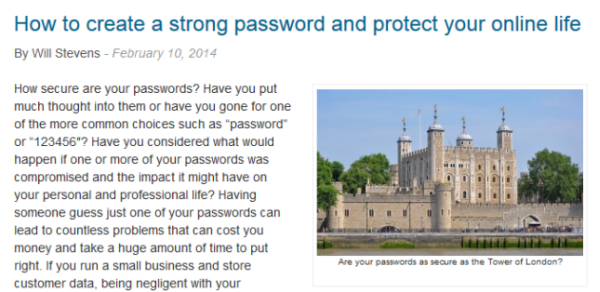
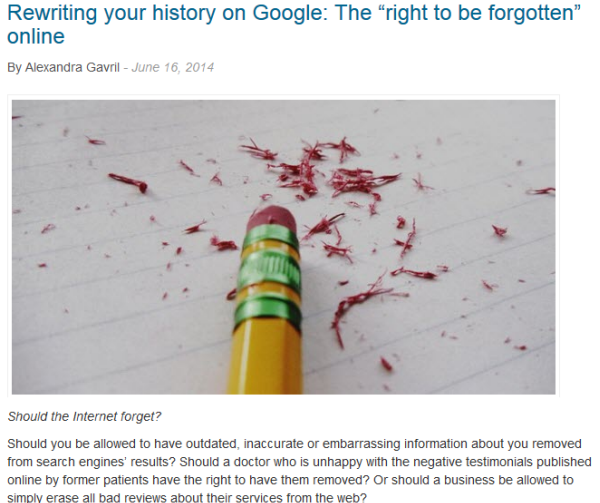
See how Will Stevens’ post on our blog starts with an image that together with the caption immediately reinforces the headline and makes it powerful?
2. Screenshots
Screenshots are a great way to show rather than tell. Sure, you could tell your readers about the crazy email you received but that wouldn’t be nearly as powerful or engaging as showing them. By letting them see it for themselves, it adds authenticity to your post.
Here’s an example of a letter than went viral a few weeks ago reportedly written by a little girl to her dad’s boss at Google asking if he could have a day off for his birthday.
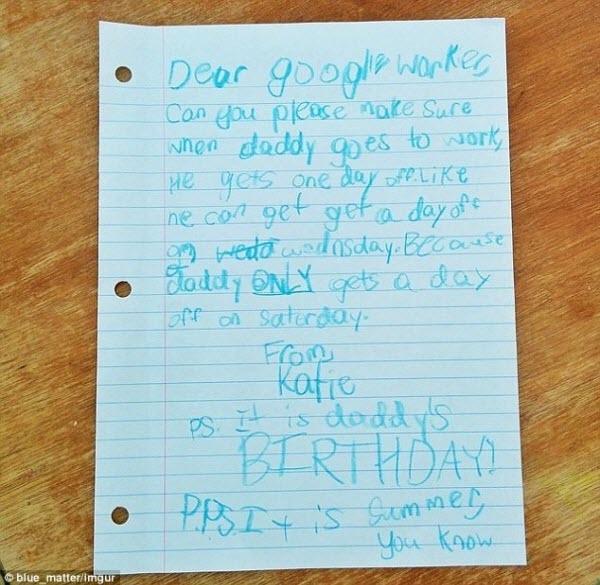
If newspapers had typed out the letter instead of including an image of it, do you think it would still have had the same impact?
There are many tools you can use to take, store and share screenshots easily. I prefer Snagit and the Snipping Tool from Windows but you can use any other you prefer.
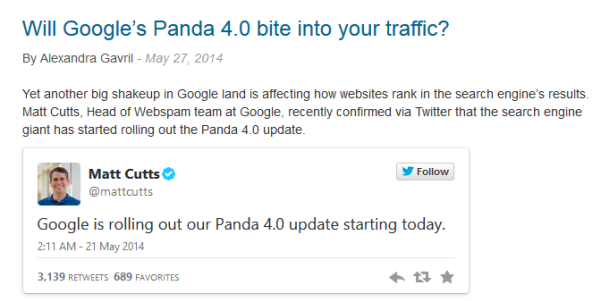
When it comes to updates on social networks, you can simply embed a status update or a tweet into your blog post with a few clicks. For example, on Twitter you can click “More” on any tweet and you will have the option to embed the tweet. Copy and paste the embed code into your blog post and it will look like in this post:
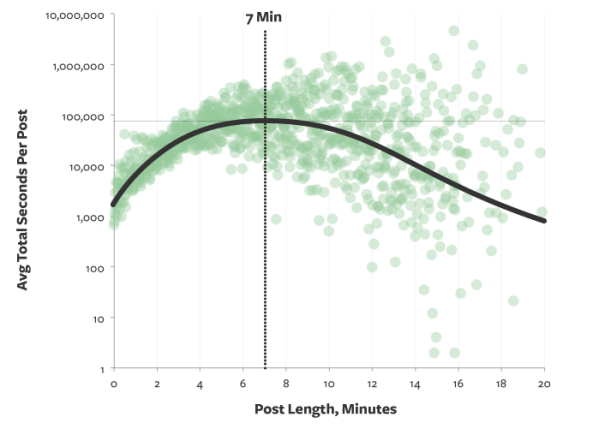
3. Charts and graphs
When it comes to stats and reports, the best way to convey data is to use images. Readers are more likely to remember stats included in an image than written in a text.
Here is an engagement graph from Medium which supports the idea that 7-minute posts (the equivalent of about 1,600 words) capture the most total reading time on average.
You can create your own charts and graphs using Spreadsheets in Google Drive.
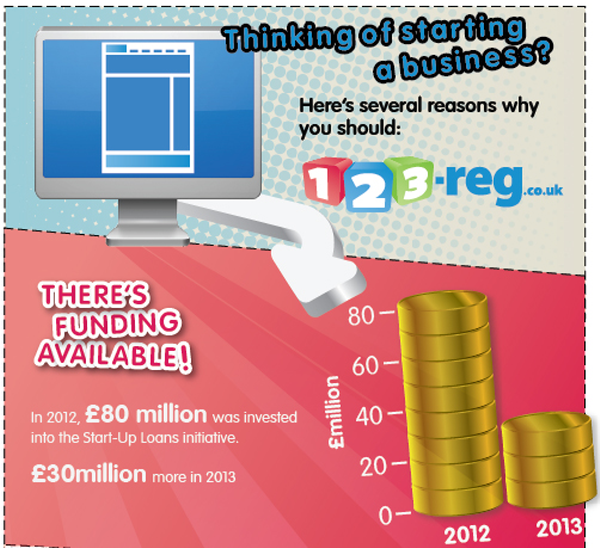
4. Infographics
Infographics are great for breaking down big research findings and for making large amounts of data digestible.
Notice how in this example about reasons to start a business we delivered not only a valuable blog post but also a valuable standalone infographic.
You can use a variety of free tools like infogr.am to quickly create a simple infographic or, if you’re willing to pay for a more complex tool, you can try Visual.ly.
5. Taking your own photos
An easy way to get images without having to worry about copyright or other legal issues is to create them yourself. So, if you have the time and talent you can create your own blog post images. With a digital camera, a good eye, and an image editor you can shoot and use your own photographs. Using your own photos in your posts can add a touch of personality and uniqueness to your posts and blog that you can’t get anywhere else. Plus, it saves you the time you’d otherwise spend searching for a free image or the money you’d pay for a stock photo.
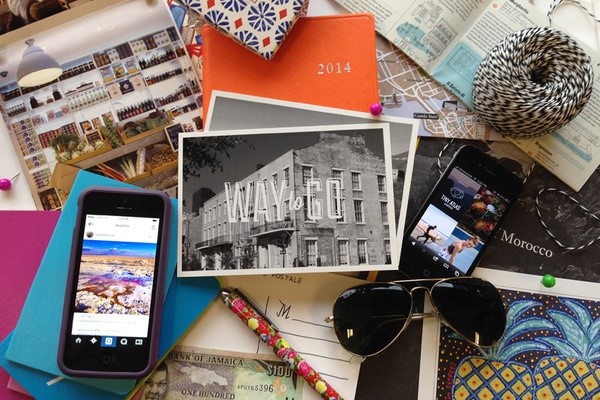
Personal photos are best used when you’re telling a personal story. It can help readers connect on a deeper level, making them feel like they’re there with you. For example, if you’re a travel blogger and you’re writing a blog post about the process of planning your next trip, instead of just posting a checklist, you can take readers through the list by simply showing them.
This example from Fathom shows what it looks like when the team plans a trip.
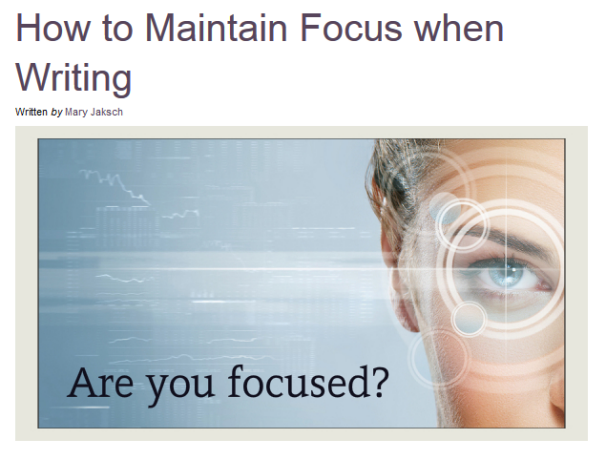
6. Custom art
Sometimes, finding an image that perfectly conveys your message is a bust. However, you can still use it and customise it yourself, even if you don’t have a designer on staff or advanced designing skills.
Here is a simple example from writetodone where the author adds text to an image to reinforce the message and make it even more powerful.
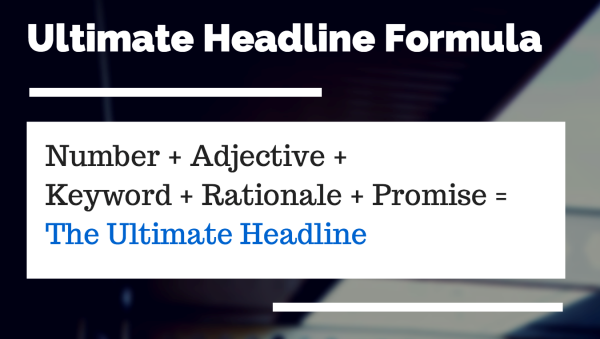
And this is another great example from Buffer where they use custom art to share a valuable headline writing formula:
What’s the best place for an image?
Most blog posts have a featured image which is the primary image that is placed at or near the top of the post. I recommend placing it as the very top of the post as it provides readers a short line introduction to the post and provides a graphical point of reference to ease them into your content. As I mentioned above, this featured image can beef up the headline and pique readers’ interest even before they get to read a word from your blog post.
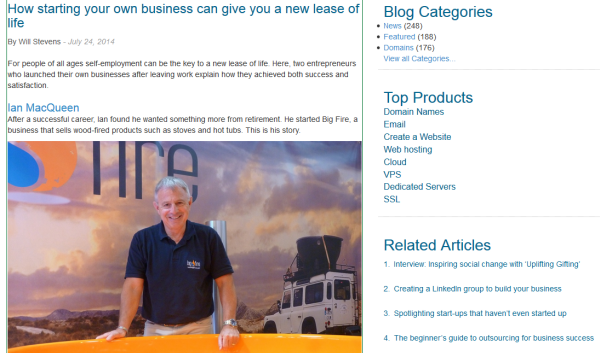
You can go with a full width featured image at the top of your post, like in this post:
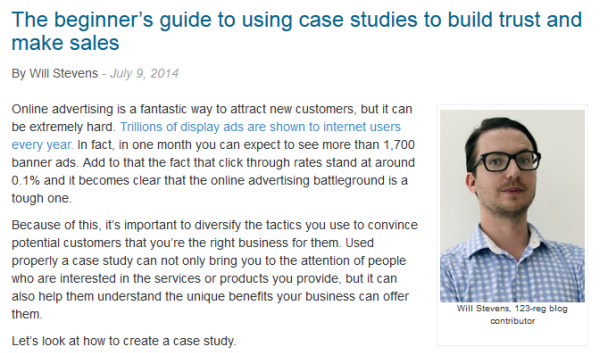
Or you can go with a half width image (or slightly less than half width) featured image aligned to the right of the top of your post like in this example:

You can even include an author photo on the right so readers can put a face to the name, like Will did in this post:
However, don’t ever align images to the left because it makes reading content more difficult.
D Bnonn Tennant, conversion-rate optimisation consultant, explains:
“When we read, we rely on the left margin always being there as an anchor, to give us a place to return our eyes to. Without a consistent left margin it’s exceptionally difficult to follow the text.”
So when there’s an image on the left, it makes it difficult to follow the text as our eyepath is interrupted, along with our attention. So, make sure you always align images on the right margin and never break the left margin.
How many images you use is up to you. For short posts one is enough but for longer posts, feel free to use more. Use the main image at the top to make your headline more powerful, and then spread other images throughout the post to break up the post visually. What you shouldn’t do is include a bunch of irrelevant images simply to break up your text as your content will end up looking confused. Images should make reading easier not harder. If you break the text too much, the piece will actually become harder to read.
What’s the best image size?
When it comes to the size of your image there are two main options:
- Full width
- Half width
You can use full width for your featured image as well as for screenshots, graphs and infographics which need to be bigger so readers can see clearly what’s on them. For infographics, you can add a thumbnail that readers can click on to see the large version. The maximum size for full width images depends on the design of your blog and on the size of the content block on your blog. This means you need to make sure it aligns to the content.
Here is an example from one of our posts:
This image is full width as it’s as big as the block of content on the page. So when you add an image like this in your posts, take your blog’s layout into account so you don’t add an image that’s too big.
Half width images are great for breaking up the text and prevent the reader from getting bored. Think about it – what do you find easier to read? A huge block of text or smaller paragraphs broken up nicely by an image or two?
The legal issues of using images
One of the most important things to consider when choosing an image to use in your blog post is: do you have the right to use it? That’s right – not all images on the web are free to use, and unless you want to learn the hard way and pay a $4,000 fine, like this copywriter has, make sure you always stay above the law. Essentially you want to make sure that you are not using protected images that are violating copyright laws.
You’ve probably heard about royalty-free or creative commons but what do they really mean?
What does royalty-free mean?
When it comes to royalty-free (RF) images, the term “free” is definitely misleading, because royalty-free images are not free.
To download and use a RF image, you need to pay a one-time fee. Then you will be able to use that image as many times and in as many places as you want.
So, the “free” in royalty-free does not mean there is no cost for the license, but instead refers to being able to freely use that image multiple times and in multiple places without having to pay additional royalties for each use.
Here is an overview on what RF means:
- Pay a specific one-time fee to use the image multiple times for multiple purposes (with possible limits, depending on the license or stock photo site).
- No time limit on when the buyer can use an image.
- No one can have exclusive rights of a royalty-free image (the photographer can sell the image as many times as he or she wants).
At the end of the day, you want to make sure that you read the terms of use of the site you’re purchasing the images from as licenses vary from one site to another.
Bigstock, iStockPhoto and Corbis are the most popular sources for RF images but there are many more. Check out Web Designer Depot’s A-Z list of stock photo websites.
What does Creative Commons mean?
Creative Commons(CC) is also a popular term. It is used to allow the creator to specify their own licensing for their work as they see fit.
Here is the official definition:
“The Creative Commons copyright licenses and tools forge a balance inside the traditional ‘all rights reserved’ setting that copyright law creates. Our tools give everyone from individual creators to large companies and institutions a simple, standardized way to grant copyright permissions to their creative work. The combination of our tools and our users is a vast and growing digital commons, a pool of content that can be copied, distributed, edited, remixed, and built upon, all within the boundaries of copyright law.”
There are multiple types of CC licenses and some of the most common ones are:
- Attribution – You allow others to copy, distribute, display, and perform your copyrighted work – and derivative works based upon it – but only if they give you credit.
- Non-commercial – You allow others to copy, distribute, display, and perform your work – and derivative works based upon it – but for non-commercial purposes only.
- No derivative works – You allow others to copy, distribute, display, and perform only verbatim copies of your work, not derivative works based upon it.
- Share alike – You allow others to distribute derivative works only under a license identical to the license that governs your work.
Find out more about all CC licenses.
One of the biggest supporters of CC has been Flickr which I also often use to get high quality images for my posts, and here is how you can use it too:
1. Go to the Flickr homepage and type in a search term
2. Click on Any License and tick Creative Commons only and then both options: Commercial use allowed and Modifications allowed.
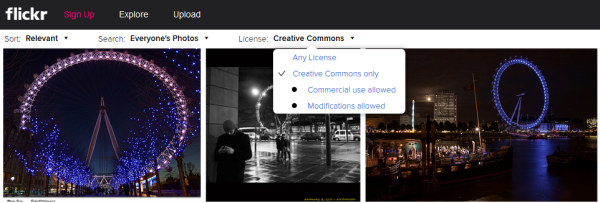
This gives you more freedom to alter the images and use them in your blog posts. Remember, you have to check the terms of use for each image.
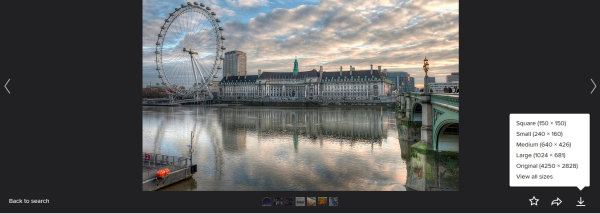
3. Once you see the results, click on the image you would like to use.
4. Scroll down and check the license by clicking on the link provided (e.g. “Some rights reserved”). This should take you to the Creative Commons license where you can learn how the image is to be used.

For example, “Some rights reserved” takes me to this Creative Commons license. Here I learn that I can share the image, adapt it (like add text) and use it commercially. However, I must provide attribution such as linking to the original image on Flickr and crediting the owner.
5. Once you are aware of the terms, click on the arrow to choose the size you want to use on your blog and download the image.
6. Upload the photo to your blog.
7. Don’t forget to follow the CC license of the image you’re using (like crediting the author, linking to the image page on Flickr, etc.).
Where to find free images
To get you started, below are a few of the most popular sites that provide free and legal photos that you can use in your blog posts:
Check out this post for some other good sites to download copyright free images.
Final tips on using images in your blog posts
Here are some final tips on using images in your blog posts that I’ve come up with after years of blogging:
- SEO – Your images will be indexed by Google so make sure you optimise them properly. They should be high quality and also be renamed so they are relevant to the content. Name your images with your chosen focus keyword and include that keyword in the alt tags when you upload.
- Minimise file size – Although you want the highest quality possible it’s best to minimise the file size load on your server and your end user. Images increase page load time which is one of the top reasons why readers abandon a page. Use an application like Image Optim to “compress” the image to its lowest level and minimise file size.
- Host images on your own server – Avoid linking to external sites and instead host images on your server and blog so that you know they will always be there.
- Be creative – Ultimately you want to be as creative as you can with your use of images so that it represents your blog and brand as best as possible.
And don’t forget to have fun!
Have any other tips on using images in blog posts? Share them with us in a comment below.
Image by Kenneth Lu/ Flickr.com


