How do I create a mailbox?

This article will show how to create a mailbox with 123 Reg.

Setting up a mailbox with 123 Reg is an incredibly easy process that only takes around 2 minutes to complete. Simply follow the step-by-step instructions below:

For Generation 2 mailboxes

Step 1 of 6

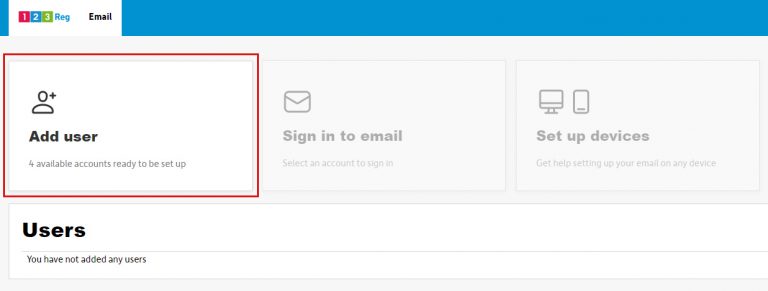
Start by accessing your Email Dashboard.


Step 2 of 6

From there, select Add user.

Select Add user


Step 3 of 6

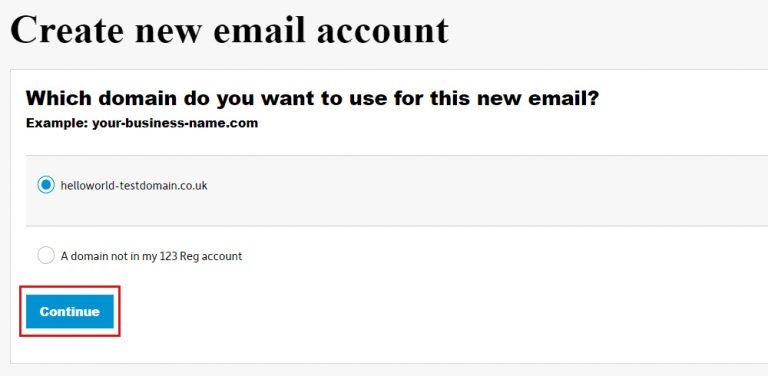
On the next page, select the domain name you want to use as the basis for your email address. Once done, click Continue.

Choose domain


Step 4 of 6

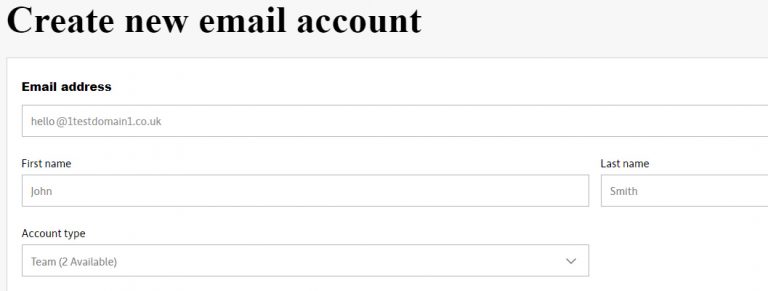
You’ll now need to enter your details into the provided fields and select what type of account you want to use for your email address, along with the permissions.

Enter account details


Step 5 of 6

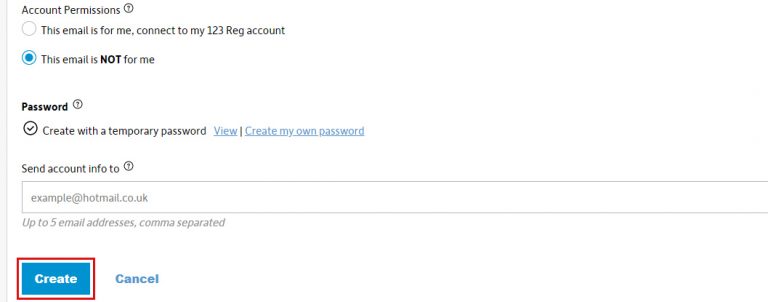
From there, enter an existing email address into the Send account info to field, where your account details and additional information will be sent to after completion.

Once done, click Create.

Create account


Step 6 of 6

After a few minutes, your email address will be ready. Congratulations!


For Generation 1 mailboxes

Step 1 of 5

Start by logging in to your 123 Reg Control Panel.


Step 2 of 5

From there, select Email within the ‘Manage active products’ section and then click Manage opposite Manage your email.

Manage email


Step 3 of 5

This will take you to the ‘Manage your email’ page where you can view all the email addresses you currently have. From here, click the Create field that appears near the top of the page and select Mailbox from the drop-down menu that appears.

Create Mailbox


Step 4 of 5

Enter the relevant details for your new email address. This includes:

Email address: the name you wish to use for the address. Make sure that you have the correct domain selected and type in a phrase that will appear before the ‘@’. This could be something as simple as ‘hello’ or ‘info’, or something more specific such as ‘john.smith’ or ‘marketing’.

Type: whether you want this to be a ‘Mailbox’ that can send and receive emails, or a ‘Forwarder’ that will only receive mail. For more information about email forwarding, please read our Support article:

Package: the Email Hosting plan that you wish to use for your mailbox. You’ll need to have purchased one of our packages first before you can use it for your mailbox.

Password: this must be a minimum of 8 characters and should include a mixture of lowercase and uppercase letters, numbers as well as special characters such as (i.e. !, #, *) to ensure maximum password strength.

Enter your details

Once you’ve entered all your details, click Save & Exit to set up your mailbox.


Step 5 of 5

The page will then refresh itself and your new mailbox will be displayed, ready for you to use. Congratulations!

View your email address