Hashtags are words or phrases prefixed by the # symbol that help organise social media content into discoverable categories. Anyone looking at a particular hashtag can then discover your posts, extending your reach.
They’re one of the key ingredients that go into “organic” social media marketing, having the potential to connect businesses to audiences and raise brand awareness, without the need for paid ads.
That said: your time and energy don’t come for free. This is why it’s so important to come up with a good strategy. But with so many other players in the game, it takes a #GamePlan and a little #Creativity.
Why tags matter
Having a “presence” on social media is a must for online businesses today. There are over 56 million active social media users in the UK alone, according to DataReportal. To put that another way: around 85% of Brits with internet connections have at least one social account.
First introduced to Twitter/X in 2007, tags are now visible on all the major platforms. YouTube joined the #Party in 2018 when it started using tags for video discovery of trending topics. LinkedIn and TikTok have them, too.
Hashtags have the power to connect creators with massive audiences. It’s tough to put an exact figure on how many get posted across all but, as an example, the most popular tag on Instagram last year was #Love, with 2.1 billion posts (thankfully #Hate only managed 8 million).
Depending on the context and the study you trust, posts that use tags well can see anywhere from 12% to even hundreds of percent more traction than those that don’t. This leads to likes, comments, and shares from people interested in what you have to offer.
For sure, hashtags are only one ingredient in the social media recipe. Quality content is king (hashtags are just the horses to get him out there). For online businesses, the goal will be to build brand awareness, connect with your target audience, and hopefully watch your enterprise grow.
Do your research
Step one: start by creating a list of topics related to your online business and the products or services you offer.
Brainstorm popular keywords in your niche, industry, or location. Think about the type of content you’re going to post and what your target audience is most likely to be looking for. Check out what your competitors are using and make sure you’re following the relevant hashtags yourself. Remember, the aim here will be to build a community around your brand and attract more followers (and customers).
Start with the basics
Hashtags are to social media a bit like what keywords are to search engines: they act as labels, connecting your content with a targeted audience interested in a given topic.
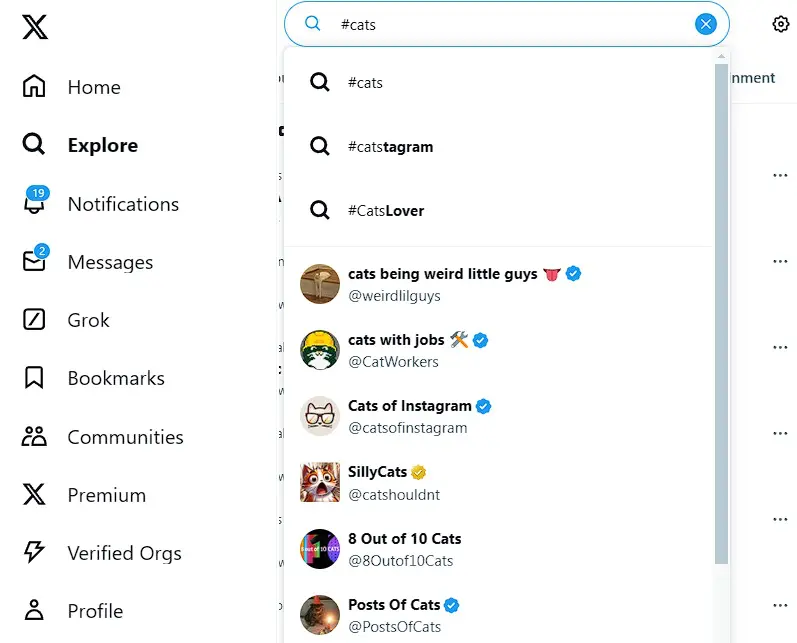
The easy thing about hashtag research is that all the tools you really need are built right into each social media platform: just head to the search bar on your chosen social, start typing in a few keywords with relevance to your business, industry, and area, and explore the suggested hashtags that pop up.
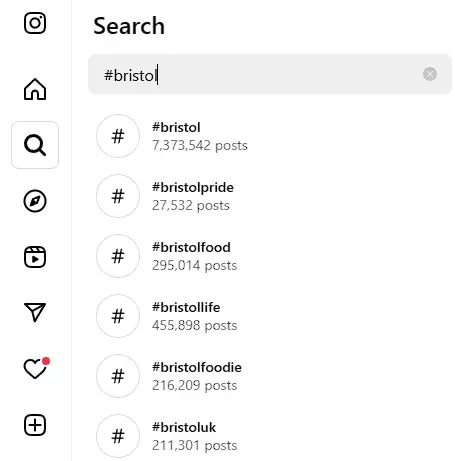
A quick search should help reveal the most popular options, as well as niche or local keywords, giving you a better understanding of what hashtags might work with your target audience. With the exception perhaps of ‘Trending Hashtags’ (more on that later), there’s nothing so complicated that you’d need to pay for third-party tools. Intuition will do.
On platforms, the most popular posts will sit in a Top Posts section or similar. The rest will show in the order they were posted (Most Recent). Other social media platforms, such as Facebook, Twitter, and LinkedIn, also have similar features where popular content is highlighted in sections like “Top Posts” or “Trending,” while the rest of the content typically appears in chronological order in feeds like “Most Recent” or “Latest.”
Finding insanely popular hashtags is like shooting fish in a barrel. Tags with millions and billions of posts are readily discoverable in the search bar and, at surface value, they might seem a great way to reach huge audiences right away. If only things were so easy!
Aim for the sweet spot
The reality is that for tags used in millions of posts already (#sunset #foodie #festival), any post that hasn’t made it to the top will have slipped down the page in nanoseconds. Your post is all but certain to become another drop in the social media ocean.
Whereas tags that are too popular will get you lost in the crowd, ones that are too specific and niche may not reach enough people. The key is to find tags that both gain traction but stay targeted.
A good rule of thumb is to avoid hashtags that have been used less than 10,000 times or more than 300,000 times. Aiming for hashtags that fall between these two numbers, you’re more likely to reach a decent audience that is actually searching for that topic. Just try to keep them relevant to your business and to the content you’re posting.
Start choosing your hashtags
Use the most popular tags as springboard for finding more relevant tags. Start typing a broad keyword (like #travel) and the search bar will suggest others. This way, you’ll be able to find hashtags beyond the super generic ones.
The more you think about it, the more there are to choose from. They can all make the difference between getting lost in the shuffle or reaching the audience you want to connect with:
#Categories
1. Popular Hashtags
Highly general tags on topics and subjects with very broad and obvious appeal.
➯ #Food #Music #Fashion #Art
2. Niche and Industry-Specific Hashtags
More specific and valuable tags that focus in more on targeted topics.
➯ #HomeYoga, #IndieGameDev, #DIYHomeDecor
3. Local Hashtags
Tags that target one neighbourhood or region and connect with a local base.
➯ #BristolFoodie, #LondonTravel
4. Trending Hashtags
Tags focused on current events or fashions that get temporary traction.
➯ #SustainableLiving, #NationalDogDay
5. Events Hashtags
Designated tags relating to specific events.
➯ #Wimbledon2024, #JohnandJaneWedding
6. Audience and Community Hashtags
Tags that connect with existing online communities relevant to what you do.
➯ #TravelAddicts, #YogisofInstagram
7. Branded Hashtags
Tags with direct relevance to your company or product and that can boost brand awareness
➯ #MadeWithLove #123Reg.
8. Cause Hashtags
Tags that raise awareness for important issues or charities.
➯ #FairTrade #UNICEF
9. Descriptive Hashtags
Tags that describe the content of your actual post, including places.
➯ #SummerRun #LondonBridge
10. Time/Date/Season Hashtags
For specific moments:
➯ #Tuesday #TFIG #MerryChristmas #HappyHanukkah
11. User Generated Content Hashtags
Tags that promote community-driven content
➯ #Selfie #MyStory #DayInTheLife
12. Novel Hashtags
Newly-created tags for new trends or stylistic use
➯ #PancakeArtChallenge #Awkward.
Niche and Industry-Specific Hashtags go beyond general terms. There’s more chance of attracting users who are actively looking for those specific products or services. More targeted hashtags tend to connect with a more engaged community and lead to greater engagement.
Local Hashtags target an audience where they are (or potential tourists). Again, it’s best to avoid the obvious. Rather than #Bristol, opt for less saturated choices, like #BristolFood, #BristolLife, #BristolGraffiti.
While Trending Hashtags can be useful, only use them if they truly fit your brand and the content you’re posting. That’s true generally: if users aren’t actively using or searching for a hashtag, there’s no need to include it.
The exception might be if you’re creating a new and unique branded hashtag in your marketing strategy. These could be based around slogans or mottos (#MadeWithLove #BestofBritish) or with specific reference to only your brand (#123Reg #EasyAs123).
Hashtags that encourage user content (#Selfie) can play a big role in growing your community online. These are the kind of tags that encourage people share their personal stories and connect with others who have similar interests. Use them to connect with your audience and promote engagement.
Know your limits
Each social media platform operates with its own quirks when it comes to hashtags. Some prefer a smaller number of trending hashtags for maximum reach, others work better with a mix of more and varied options, including niche and branded hashtags. YouTube is more open to long-tail keywords in the description to boost discoverability.
Here’s a quick overview of the recommended guidelines. When it comes down to it, understanding the right number of tags to use can come down to trial and error.
| Platform | Maximum Hashtags | Recommended |
| 30 per post | 5-10 targeted hashtags | |
| No official limit | 3-5 relevant hashtags | |
| X (Twitter | No official limit | 3-5 relevant hashtags |
| No official limit | 3-5 relevant hashtags, mixing broad industry and niche terms | |
| TikTok | No official limit | 3-5 relevant and trending hashtags |
| YouTube | 15 per video description | 3-5 relevant hashtags, focusing on the first 3 above the title |
Each social media platform (other than TikTok at the moment) has its own best practices on the number of hashtags to use to boost discoverability, and these are changing all the time, so you might like to check out their official guidelines: Instagram | Facebook | X | YouTube
Find a formula that works
Choosing a formula for hashtags can help improve your reach. This should get your content seen by enough people to make an impact while at the same time hitting those potential customers who are most likely to engage with your business.
Ideally, you’ll want to use a combo of moderately popular hashtags that attract a wider audience, together with more specific ones to target the right group of people. A good formula might be:
Relevance + Specificity + Trend
➯ #BristolGelato #VeganTreatsBristol #SummerScoops
Topic + Benefit + Community
➯ #GelatoLoversBristol #CoolDownHappiness #BristolGelatiers
On platforms that favour more hashtags like Instagram and TikTok, the “3×3” strategy is often cited as a good rule of thumb. That is: 3 about the topic, 3 for the problem you solve, and 3 aimed at your audience or location.
Put your tags in the right place
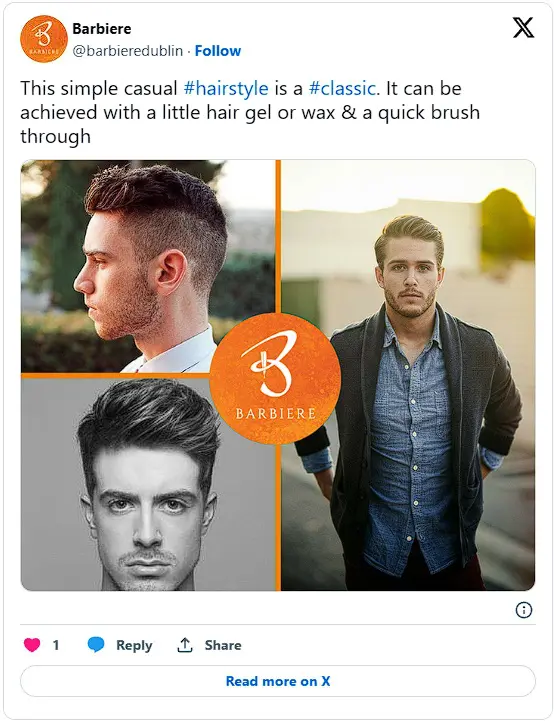
Some platforms allow hashtags within the caption, while others prefer a cleaner look. It’s usually best to sprinkle a few relevant hashtags in your caption for a natural flow or add them as a comment after posting to keep your caption clean.
Captions are often truncated on feeds. On Instagram, you can actually hide your hashtags into those blank lines. so these hashtags will only be revealed if someone clicks “see more.” Alternatively, you can post your caption as is, and then add a separate comment containing only your hashtags.
Insta is currently the only major platform that lets you put clickable hashtags in your bio. These don’t affect search rankings, but including a unique branded tags can encourage people to use it in their posts about your business.
More #TopTips
Save your winning hashtags
Once you’ve created a few good hashtag formulas, save them for later. You can categorise them based on the type of posts you make. Notepad or similar will do. You can use social media management tools if you’re struggling to juggle multiple accounts.
Switch them up
To reach a wider audience, try to use a good variety of hashtags. Aim for fresh combinations every few posts or at least no more than twice in a row. This will keep your content discoverable for new followers who might not have seen your posts before.
Spark engagement
Don’t let your posts be one-way streets. Spark a conversation! Ask questions in your captions, respond to comments, and encourage interaction. This builds a community around your brand and keeps people coming back for more. You might even use tags to launch contests or challenges.
Engage with other posts
Don’t be passive: Remember to like, comment, and interact with posts from other users and business. This is also another place where you can drop a relevant hashtags.
Keep your hashtags short
Self-explanatory, this one. Make sure your tags aren’t #TooLongToBotherReading
Keep up with trends
It’s important to follow trending hashtags to connect with what people are talking about. Watch fashions and influencers in your industry to spot new trends and popular tags. The Instagram Explore page is a great place to start. It can help you discover new content and creators. You can search for keywords related to your content.
Use hashtag etiquette
Using too many irrelevant or viral hashtags can clutter feeds and give off the wrong signals. Topics (and comments) should be approached with a sense of decorum – avoid negativity. Also, don’t use banned hashtags (#naked #nudity) because they won’t show, anyway!
Use hashtag research tools (if you need to)
For hashtag research, there are several useful tools that can help you track hashtag performance and find new ones. These tools look at things like how many posts use a hashtag, how much engagement it gets (how many people like, comment on, and share your posts), and what other hashtags are often used with it.
They’re not essential, but can be helpful if you’re handling multiple accounts and campaigns. Some of the popular hashtag research tools include: Hashtagify, Sprout Social, Later, Sistrix Instagram Hashtag Generator, and RiteTag.
Schedule
It’s a good idea to have a content calendar so that you can plan posts in advanced. Taking that a step further, you can also use tools to schedule content for you. There are a number of freemium and premium apps out there that let you plan content, pick peak posting times, and auto-publish ahead of time. Examples of popular social media scheduling apps include Hootsuite, Buffer, Later, and Sprout Social.
Track and analyse
Social media isn’t all about hashtags – far from it. But they do play a role when it comes to understanding how well your posts are going down with your target audience. To gauge your impact and improve your game, analytics tools can track the important things, like engagement, the number of views, and how many new followers you’re getting.
Throw in some funnies
How does a penguin build its house? #IgloosItTogether
And so on…
Wrap Up
That’s the lowdown on hashtags! We’ve gone over finding the right ones, striking a balance between popularity and reach, and thinking about the magic numbers (don’t go overboard!). But while hashtags are a right handy tool, they’re not the be-all and end-all. Quality content is king. Hashtags can amplify your message, but great content is what really makes the difference.