
Note: Although this article talks about how to create a plumbing website, the advice applies to any kind of small business. Just pick a relevant template when creating your website.
These days, we head to Google and other search engines to look up answers and solutions for everything – from how to make candles or choose a hoover to finding the best nearby emergency plumber.
Sure, there are still some people who check out newspaper ads and flyers to find a local tradesperson (or other small business) but that’s beginning to happen less and less.
So, it goes without saying that if you want business to succeed, you need a website. You need to get your business online, where customers are searching for your services.
Thankfully, now it’s easier than ever to create a website so potential customers can find you online and book your services in minutes. This is where our Website Builder comes in — an all-in-one package that lets you build an expert-looking website quickly and easily, even if you have no technical skills.
In this guide, we’ll walk you through six steps to follow to create your website from scratch, whether you’re a plumber, an electrician, or a career coach.
1. Get your Website Builder package and free domain name
The first step is to visit our 123 Reg Website Builder page and decide on the right package for your needs. After you click Buy now, you can claim your free domain name. The great thing about the Website Builder is that it comes with a .co.uk, .org.uk, .me.uk, .uk, or .com domain that’s free for the first year. If you already have a domain name, don’t worry it’s easy to connect an existing domain with Website Builder.
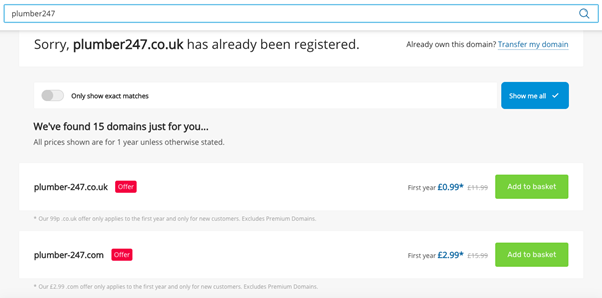
If you’ve already decided on the perfect domain name for your business, enter it into the search box. If you need some recommendations of what’s available, simply enter one or two keywords that describe what you do, and then hit enter to start your search.
Not sure what to name your business and website? Here’s everything you need to know about choosing a business name and a domain name.
If your perfect domain name is available, add it to your basket. If it’s not, then scroll down and check out alternatives that you can register right away.
Next, go to your basket to finalise your purchase.
One final step here is to go to your Control Panel and assign your domain to your Website Builder package. That’s it. Now you’re ready to get started creating your professional website. And the great part about it is that you don’t need to touch a line of code.
2. Choose your template
The next step is to pick a design for your site. Go to your Website Builder dashboard, and then select Professional Services (or the category that best matches your kind of business) from the Categories menu on the left.
You’ll notice there are lots of pre-made templates designed specifically for plumbers, electricians, gardeners, cleaning services, and other professional services. Scroll through the options and pick the design that reflects your brand personality and what you do.
Let’s go with a plumbing template.
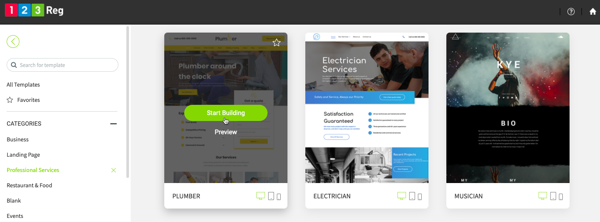
Click Start Building. This opens the site editor where you can customise your website.
3. Fill out some basic information about your business
You’re now in the site editor where you can change colours, add text and images, move sections around, and much more. You can find lots of options to customise your site in the menu on the right.
For now, let’s add some basic details about your business. Go to Content on the left and then click on Business info. Fill out the form with your business name, logo, location, phone number, email address, business hours, social media accounts, and more.
Next, go to Settings. This is where you can add a favicon for your site, which is the icon that people see in their browser tab when visiting your site. It’s also where you can add your meta title and description for search engine optimisation purposes.
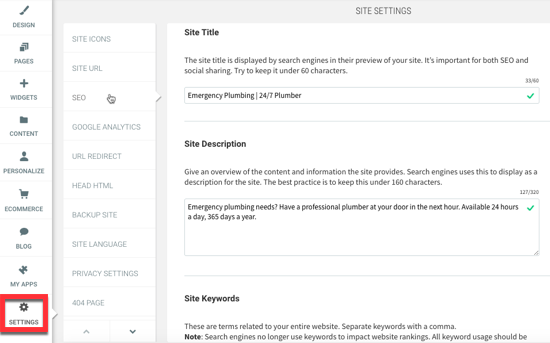
Make sure you don’t skip this step as the information you add here is what people view in search engines results when looking up your services or business name. Check out this post for more information and examples of how to write title tags and meta descriptions that get clicks.
4. Customise your website to make it your own
Now it’s time to customise your pages. Let’s look at a few things you can change on your homepage to make it your own. You can make changes just as easily to any other page on your site.
While you can drag and drop elements anywhere on this page, this template is well organised, so we’ll stick with it as it is.
So, here’s what you can get started with:
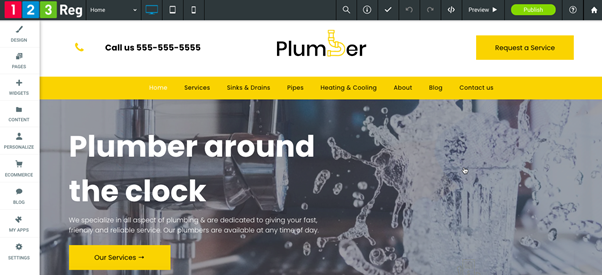
- Add your logo at the top, if you have it.
- Add your phone number on the top left. This template uses a click-to-call widget which means that visitors can quickly give you a call by simply click on the phone number.
- Change the text on the call-to-action button on the top right. This usually sends people to the Contact page (although you can pick a different page) so make it enticing. Read this post for tips to create a powerful call to action.
- Add your text to describe what you offer and why clients should choose you over the competition.
- Add your images or choose different ones available in our library.
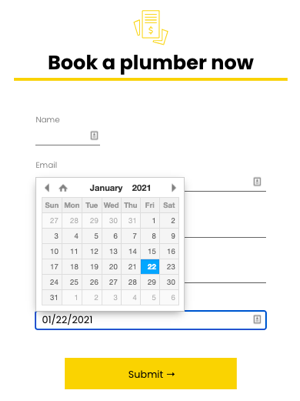
You can also customise your contact form. This particular template includes a contact form that lets visitors fill out their information and needs and book your services in seconds.
You can edit the form as you like. You can add date and time fields that prospects can fill in. You can also choose where you want to receive those submissions such as a Google Sheets, MailChimp, and more. But even if your selected template doesn’t include a form by default, you can always go to Widgets on the left to add one to one or more pages on your site.
Here’s how it looks:
To change anything, all you need to do is click on an element on the page. A pop up opens with more options such as alternative images to choose from, styles, colours, and more. Your changes are saved automatically. And if you’re not happy with your change, you can always click Undo at the top.
5. Decide on other pages you want to add
Go to Pages on the left to see the pages that come with your selected template. You can add new ones and delete any you don’t need. Click on a page to rename it and also optimise it for search engines.
Not sure what pages to include on your site? At the very least you should have the following:
- Home
- Services
- About us
- Contact us
If you happen to have testimonials from previous clients, we also recommend adding a Testimonials page where visitors can read about your clients’ experience with you.
Just as with the homepage, you can customise any page on your site. Click on a page in your template’s menu to open it in your editor and make any changes you like.
6. Review, publish, and get found online
When you’ve made all the changes, click Preview on the top right. Next, click on the different devices icons on the top left to see how your site looks on desktop, tablet, and mobile. If you’re happy with it, click Publish.
Congratulations! Your website is now online for the world to see.
What next? You should start promoting it so that more people know you exist and book your services. Read these two articles to learn how to get started with digital marketing for your small business:
- Steps to get you started with digital marketing for a new website
- Six ways to promote your business on a shoestring budget


